 The MicroView is a nifty little gadget with an ATmega328P microcontroller, an 64×48 OLED display driven by an SSD1306 controller, and an Arduino-compatible pinout. (The General Overview page at the Microview website has more useful information.) It was produced as the result of a (very!) successful Kickstarter campaign.
Unfortunately, the nice folks at SparkFun had a teensy manufacturing complication. You can read their account of the details, but the TL;DR version is they shipped out something around 2000 MicroViews with no bootloader. It sounds like they’re making every effort to make things right, and shipping out a replacement to everyone with an affected unit. But in the meantime, they’ve got some instructions up if you want to try fixing the problem yourself. (Worst case, you won’t make it any more broken; Best case, you end up with two working MicroViews for the price of one.)
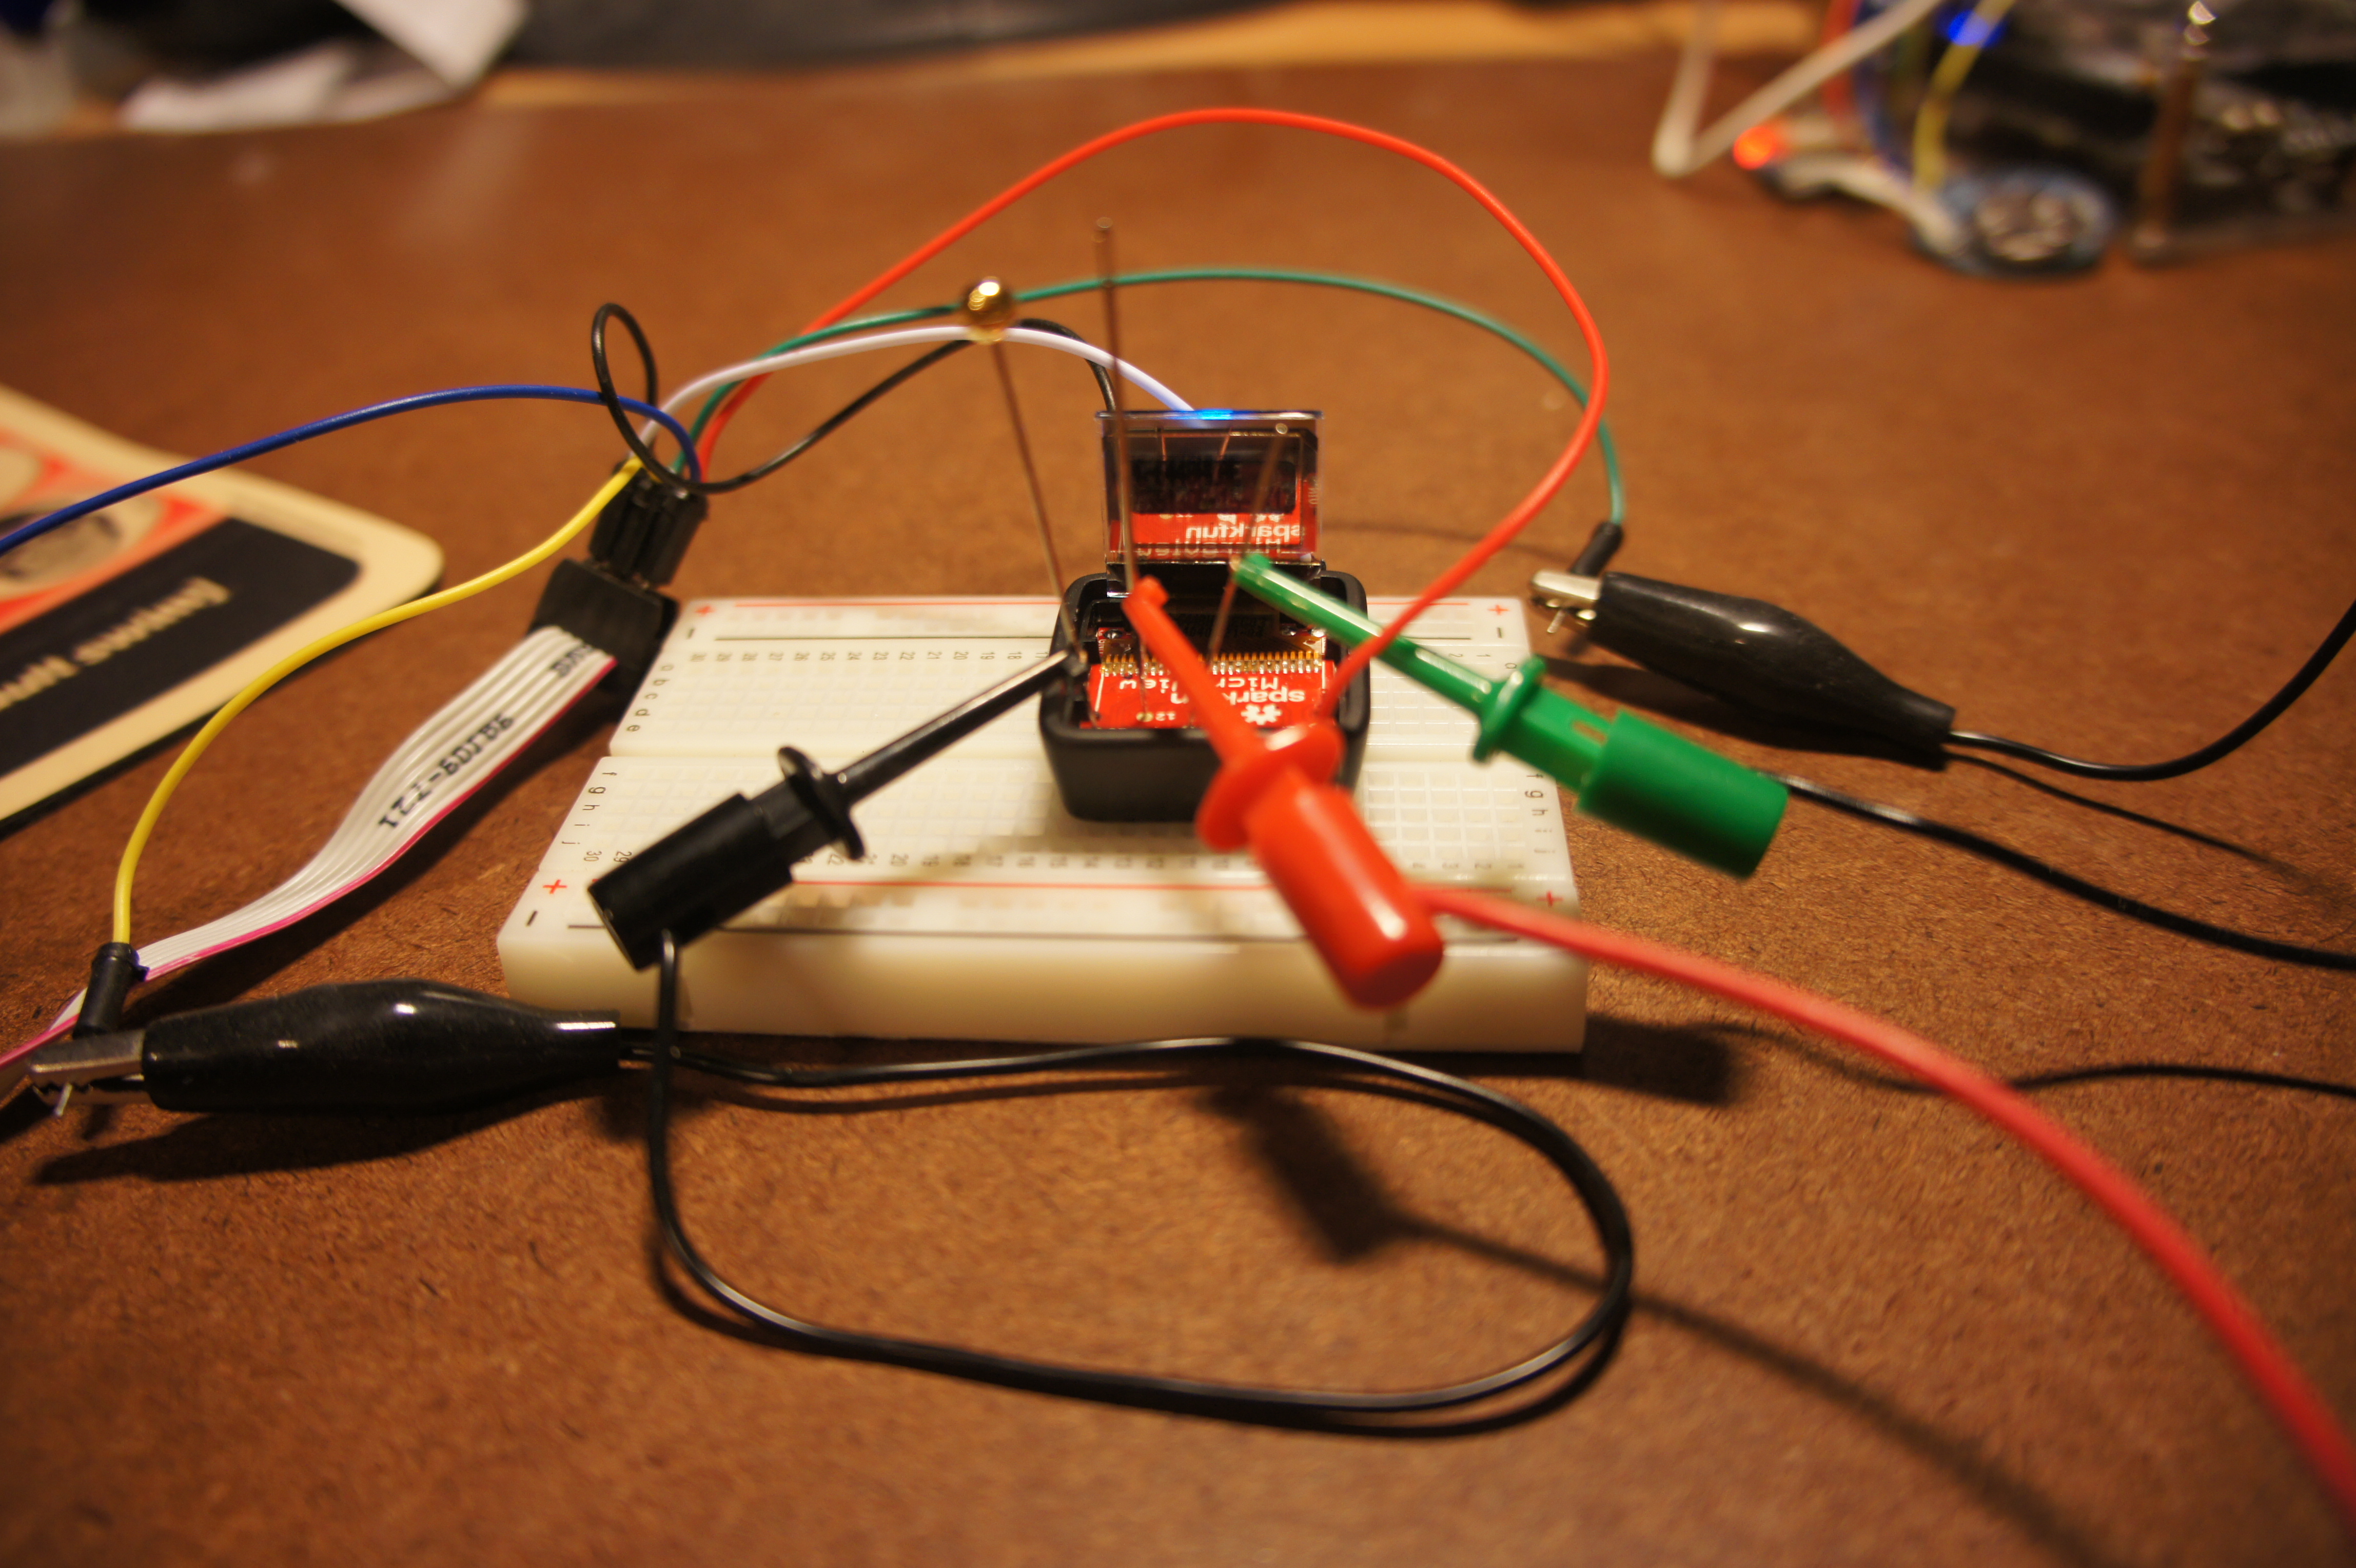
I got one of the “bad” MicroViews, and was able to revive it using the instructions. But I think I came up with an easier way to do one of the more difficult steps: connecting three wires to tiny vias inside the case. The punchline: use sewing needles (see picture above; click for larger version). Read on for more details.
First of all, make sure you have a bad MircoView. There’s an easy, web-plugin-based page for doing that.
Next, read through the fix instructions and make sure you understand what’s involved. I’m not going to repeat all the instructions here; I’m only going to talk about the method I found for connecting wires to the vias inside the case using sewing needles.
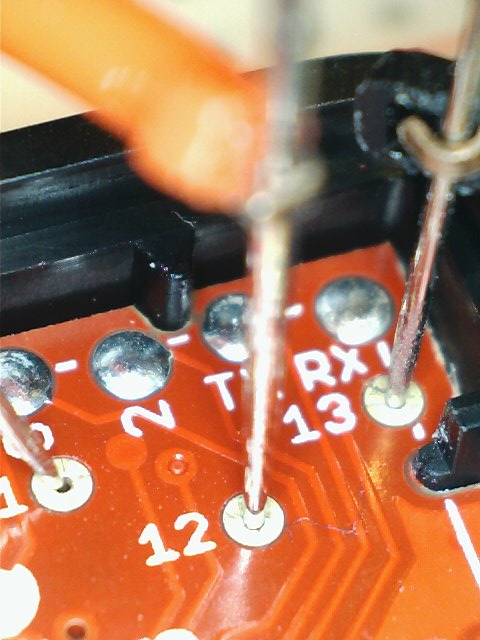
The thing that makes flashing a new bootloader on the Microview non-trivial is that the ISP (in-system programming) interface we need requires direct connections to six pins on the microcontroller, and only three of those are connected to the pins on the outside of the MicroView case. The signals MOSI, MISO and SCK are available most readily on the vias marked 11, 12 and 13 (respectively) on the internal circuit board on the MicroView.
The article mentions several methods: soldering (not a bad idea, but not exactly simple), holding the wires in place with your fingers (requires steadier hands than mine) or using bent component leads (such as from 0Ω resistors). The latter would have probably been my plan B, especially since I had miniature test clips I could connect to the same lead as was touching the MicroView. (In other words, I could have used any part with (at least) two bendable leads, not just a 0Ω resistor.)
But I had a really easy time just putting my test clips on sewing needles (OK, two needles and one straight pin), then sticking them in the vias. They stayed put just fine, and made a good enough electrical connection that I was able to reflash and verify on the first try. (Don’t shove them in super-hard, just firmly enough that they stay on their own.)
Any reasonably small needle or pin with a tapered point should do fine. I just used the first random ones I grabbed out of the sewing kit. The diameters (at the fattest part) were around 0.81mm, 0.58mm and 0.61mm.
Below are some close-up images. (The needle in via 11 is hanging off at a crazy angle because I pranged it while I was trying to shove the digital microscope in there to get the pictures. Look at the needles in 12 and 13 — that’s what you should be going for if you try this.)

Also, just to be absolutely clear: SparkFun screwed up, but so far they are doing absolutely everything they could reasonably be expected to do as far as taking responsibility for and fixing their mistake. Every single transaction I’ve ever had with them has been non-enraging, this one included. I’m a big fan of what they do and how they do it. I only wish more companies were this honest, transparent and helpful when they got something wrong.
Full disclosure: I have no commercial relationship (other than as a customer) with anyone involved.
Edited by DGH 2014-08-24 to add:
A couple more random related ideas:
- If you’re trying to hold things in place and need both hands, reflash with from the command line with a sleep preceding the avrdude command: “sleep 10; avrdude -c whatever -p atmega328p …”. (That’s for UNIX-y things. Windows users can write a batch file or something I guess.) That way you don’t need to be touching the mouse or keyboard when reprogramming starts.
- If I had to reflash a bunch of MicroViews, I might make a simple jig by drilling holes with the right spacing in a small piece of wood or plastic to hold the sewing needles. For bonus points, use clear plastic so you can see what you’re doing.