Spark Core Cloud Makefile

spark-icon-colorI recently acquired a Spark Core, and (after some minor hassle) got it connected to my network and walked through the examples. Neat product, though to some extent it suffers from problems of “trying to make it easier for the noobs, with a failure mode of making it harder for everybody” and “everybody wants to write features, nobody wants to write documentation”.

Past the jump, I’ll explain how to get around the 32-character wireless passphrase limit, and how to use cloud compilation but with a real Makefile, local copies of your source code and your favorite text editor.

Magnetometer VI: Working AVR Example

SONY DSCFinally, some progress on my AVR compass project. I’ve got a program that runs on the Adafruit Trinket and shows real compass headings, all in 3712 bytes. While it’s far from being a finished product, it’s a big step in the direction of one.

Below, I’ll give you the source code, talk about how recent compiler changes impact code size, tell you about a bug I fixed, and make a bunch of excuses for why this took so long.

MicroView: Lazy Fix

SONY DSCThe MicroView is a nifty little gadget with an ATmega328P microcontroller, an 64×48 OLED display driven by an SSD1306 controller, and an Arduino-compatible pinout. (The General Overview page at the Microview website has more useful information.)  It was produced as the result of a (very!) successful Kickstarter campaign.

Unfortunately, the nice folks at SparkFun had a teensy manufacturing complication. You can read their account of the details, but the TL;DR version is they shipped out something around 2000 MicroViews with no bootloader. It sounds like they’re making every effort to make things right, and shipping out a replacement to everyone with an affected unit. But in the meantime, they’ve got some instructions up if you want to try fixing the problem yourself. (Worst case, you won’t make it any more broken; Best case, you end up with two working MicroViews for the price of one.)

I got one of the “bad” MicroViews, and was able to revive it using the instructions. But I think I came up with an easier way to do one of the more difficult steps: connecting three wires to tiny vias inside the case. The punchline: use sewing needles (see picture above; click for larger version). Read on for more details.

Magnetometer V: Fixed-Point Math

This is another article in my series about developing a magnetometer-based digital compass. Last time, I talked about estimating code size, and what I might do to fit the application in the roughly 5.25K program space available on an Adafruit Trinket.

In this article, I replace the floating-point math with fixed-point, and make various space-saving improvements to the calibration and rotation code. Read on for more.

Magnetometer IV: Code Size

Last time, I presented a working proof-of-concept of a digital compass based on a three-axis magnetometer. That version was running in userland on a Raspberry Pi running Raspbian, which is a whole lot more computer than the Atmel ATtiny85 I eventually want to target. It was also coded for clarity rather than for speed or size.

In this post, I’ll look at some quick-and-dirty ways to estimate program size for an AVR version (as well as some simple things we can do to save space). Read on for more.

Magnetometer III: Working Prototype


In previous posts, I talked about a method of transforming magnetometer readings to compass headings, then experimented with using those transformations on real (but static) data. In this post, I’ll present a working prototype of a vehicle compass using the methods I discussed earlier.
Read on for more details.

Magnetometer Reading to Compass Heading


I’m working on building a digital vehicle compass, using the Honeywell HMC5883L three-axis magnetometer as a sensor. Answering the question “Which compass direction am I facing?” from the raw sensor output data is somewhat more complicated that you might expect. This is especially true when using a microcontroller like the ATTiny85 with extremely limited memory. Read on for a discussion of the problems involved and my solutions.

I2C with ATTiny85 on Adafruit Trinket

SONY DSCThe Trinket microcontroller from Adafruit Industries is a tiny and inexpensive (US$8 for a single unit) way to control your electronics projects. One of the coolest things about it is that you can do I²C (and communicate to lots of inexpensive sensors and displays using only two pins) and still have plenty of room left over for your code in the ~5.5KB of flash on board.

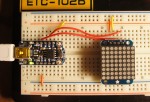
Read on to see an example of how to do I²C communication on the Trinket (or anything with an Atmel ATTiny85)  while shaving every possible byte. Also included: driving the Adafruit Mini 8×8 LED Matrix with I2C Backpack.

BeagleBone Black PRU: Hello World

This article presents what is meant to be the simplest possible example of using the PRU (programmable realtime unit) on the BeagleBone Black single-board computer. The example program has no inputs and no outputs; it does nothing other than delay for a fixed duration then exit. Read on after the jump…